Creating a space for your little one to play and grow can is a fun experience. Although, it can also be a challenging one and so I took a lot of time to get it done. After all, a beautiful, functional room that your child will love both now and for years to come is a tall order! Whether you’re working with a small room or a big imagination, making the most of your child’s space is an absolute necessity.
I am sharing some links and tips in this post on how to keep it practical and functional without having to splurge a lot.
You can also check my previous post on Tour of our son’s nursery.

1 Keeping it Simple– My idea was keeping the décor simple and furnishings to a minimum, this way we can create more space to play and provide a neutral canvas that can be easily updated as our son grows. The bed can take up a lot of space so we wanted a simple one that it can be extended with time. We have it for last 2 years now. Open shelves for books and toys not only gives easy access but also acts as décor for the room
Book Sheves from Ikea , Toy 6 Cube shelf from Target , Extendable bed from Ikea , Mini storage chest from Ikea (I updated this with some chalk paper), Cubes from H&M Home
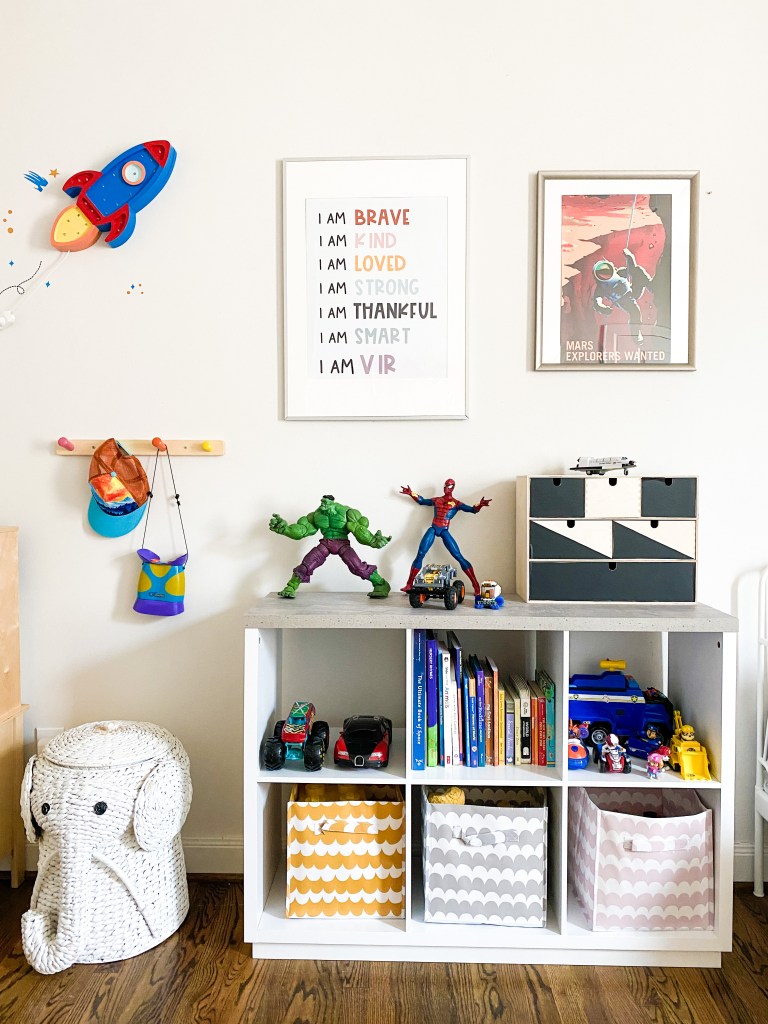
2. Designing a kid friendly space – Keeping the height in mind of our growing son we made sure the shelves, bed and toys are easily accessible. Which mean low bins, open shelving, and easy-to-access hooks all encourage self-responsibility and independent play.
3. Focus on play We have used chalkboard paper to upgrade our son’s kitchen, an easy-to-update art gallery where to display his favorite creations .
Play Kitchen – Ikea , Pin up board from Marshall , Picture frames for gallery wall , Wall hook from Ikea , 8 drawer dresser Hemnes Dresser , Rocket Night light
Some other ideas like a kid friendly swing, built-in rock-climbing wall, bunk bed slide, or ceiling-suspended cargo net also make for great options, encouraging play while helping to burn up all that extra, pre-bedtime energy if you have a big house.


4. Use wall art for inspirational quotes, images and brightening the room. A great piece of art can make a child’s bedroom, or a playroom come alive. While one wall of our son’s room has his art work , the other walls are filled with inspiring quotes, posters and personalized wall décor.
Posters from
Also a kid-friendly work area is a must. Providing your child with a place to color and create will not only keep them busy but may also help with their physical and mental development. When your child is older, a personal workspace can come in handy, offering a quiet place to study and do homework. We have his work area in our living room currently as that is where I also work from and is the most used space of our home.

5 Play with Color- Kids love color but choosing the right one can be tricky. We kept our son’s nursery white and added wall decals. And for the first time have we painted a wall in the house. Love that neutral setting can be easily updated when your kiddo is ready for a new look. And so we went to lowes and picked the HGTV-HOME-by-Sherwin-Williams-Blue-Bicycle- paint and painted 2 walls.
Here is a how to on painting
Don’t rush prep time. If you usually do your own painting, you can probably manage a half-painted wall too. Take your time, be sure you have a helper and gather all the necessary tools before you begin. Start here:
High-quality painters’ tape is a must for this project because you will be relying on it to create a really crisp, neat line.
A laser level (which usually costs $50 to $100) is a worthwhile investment for this project because it makes the process much quicker — and more precise.
If you want to keep the existing wall color, you can move along to making your line. If not, you’ll need to paint the wall first and allow it to dry.
Use the laser level to cast a laser line at the height you want, and have your helper trace the line in pencil. Once you have the pencil line where you want it, cover the line with painters’ tape. If you don’t have a laser level, measure up from the floor in several spots, mark each spot and then use a straight edge to draw a line between the marks. Check your work with a level before continuing.
Cover the floor with tarps, cover, and tape baseboards, and loosen any switch plates in the painting zone.
Paint on one side of the tape line, allow it to dry and apply a second coat if using. Wait until the paint is dry to the touch (usually about an hour) before removing the tape.

Hope this helps, more videos and information on my Instagram. I am available to answer any DMs on my IG Page or here in the comment section. Happy Decorating!
XOXO


